User Guide
FAQ
Everything About Mac Partition and Recovery Partition
If you’re a Mac user, you’ve likely encountered partitions in one form or another. They’re a part of the essential architecture of your operating system, and managing them properly can mean the difference between a well-organized system and a chaotic one. One common challenge that users often face is dealing with a lost partition on Mac. Don’t worry – this guide is here to help you conquer this issue and more.
1. Understanding Mac Partitions and Recovery Partitions
To start, let’s take a look at what partitions are and why they’re crucial to your Mac system. A partition is a part of your hard drive that’s treated as a separate entity by your operating system. They allow for better organization and management of your data, and can even host different operating systems.
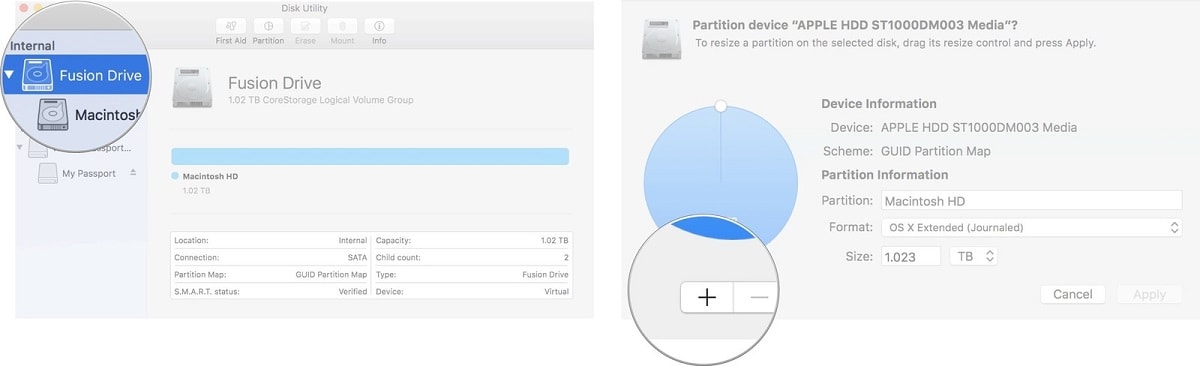
Creating a partition on your Mac is simple. You’ll need to access the Disk Utility feature, select the partition tab, and then click on the “+” symbol to add a new partition. Allocate the necessary space for the partition, and you’re all set.

Apart from standard partitions, there’s also a special type of partition known as a recovery partition. This is a hidden sector on your Mac that contains essential system files and a backup of your macOS. It’s your go-to source for troubleshooting various system-related issues.
2. Deleting a Partition on Mac
There could be various reasons why you might want to delete a partition on Mac. The partition could be taking up unnecessary space, it could be infected with malware, or you may want to erase its data. Regardless of the reason, the process is straightforward.
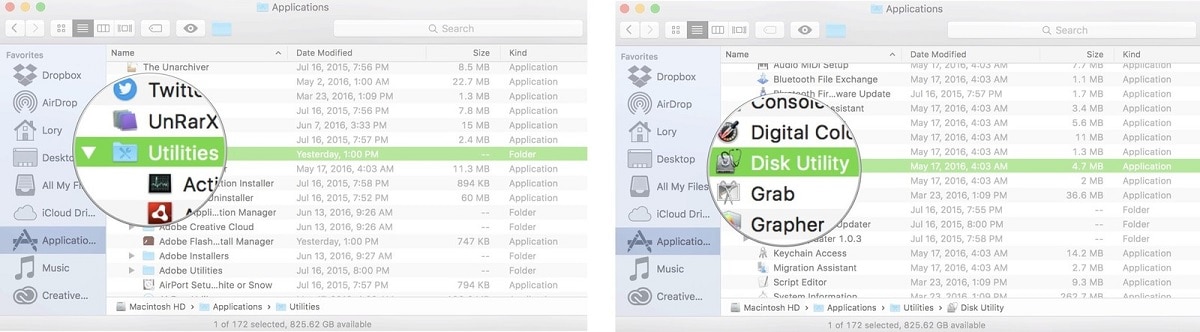
- Navigate to Applications via Finder and access Disk Utilities.
- Select the partition you wish to delete, then click on the erase option.
- To delete the partition entirely, navigate to the main drive listed as either Macintosh HD or Fusion Drive.
- Click on “Partitions” to view the logical partition of the hard drive.
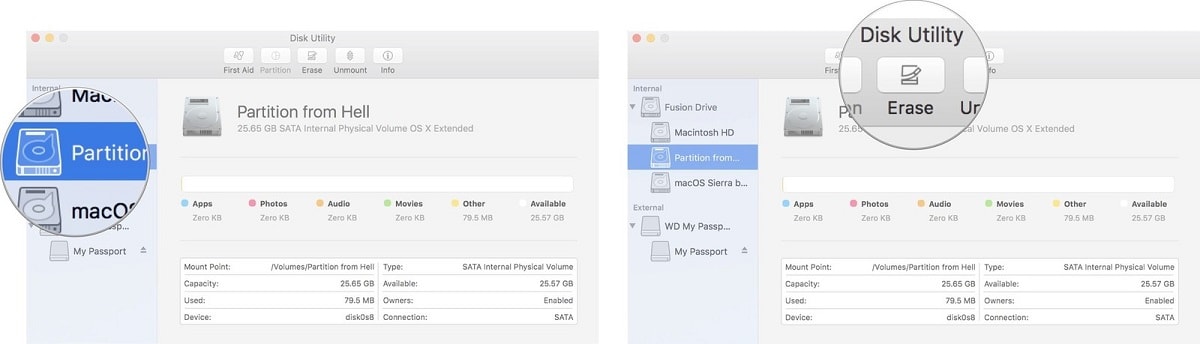
- Select the partition you wish to delete and click on the “-” symbol.

After the partition is deleted, the space it occupied will become available. You can then create a new partition or allocate this space to another existing partition.
3. Recovering a Lost Partition on Mac
A lost partition can occur due to accidental deletion, a virus attack, software corruption, or an unexpected shutdown of your Mac. If you find yourself in this situation, don’t panic – it’s possible to recover a lost partition on Mac.
One of the best ways to do this is by using data recovery software. There are several options available, but one of the most reliable is Soonmaster. It’s equipped with powerful features that can help you recover lost or deleted photos, videos, and over 1000 different types of files from various devices, including your Mac’s hard drive, USB drives, SD cards, and even crashed computers.
How to Use Recoverit to Recover a Lost Partition on Mac
- Select the disk where the lost partition was located and click “Start”.

- Recoverit will start scanning for recoverable files.

- Once the scan is complete, you can preview the files and select the ones you want to recover.

With Recoverit, you can recover your important files from a lost partition with ease.
4. Creating a Recovery Partition on Mac
A recovery partition is a necessary safety net for your Mac. It allows you to troubleshoot and fix various issues, including those related to firmware, hard disk, and file systems. If your Mac doesn’t have a recovery partition, creating one should be a priority.
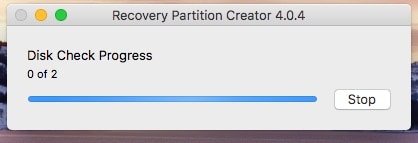
To do this, you’ll need to use a third-party tool like the Recovery Partition Creator. After downloading and installing the application, you can use it to create a recovery partition.
- Launch the application and select the target drive for the recovery partition.
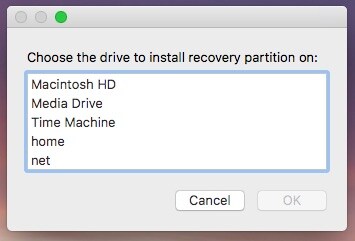
- The application will start creating the recovery partition. You’ll be notified once the process is complete.
5. Booting Mac in Recovery Partition
Booting your Mac in recovery mode provides several options for troubleshooting and resolving issues. This includes restoring data from a Time Machine backup, reinstalling macOS, getting online help, and performing disk utility.
To boot your Mac in recovery mode:
- Restart your Mac and press the Command + R keys simultaneously during the restart.
- This will boot your Mac in recovery mode, presenting you with various options for troubleshooting and recovery.

- Select the option you need and follow the instructions provided.

Conclusion
Understanding and managing partitions on your Mac is an essential part of maintaining an efficient and organized system. Whether you’re dealing with a lost partition on Mac or looking to create a new partition, this guide has covered all the key points you need to know. And with tools like Recoverit at your disposal, you can recover lost or deleted files with ease. So, keep exploring the potential of your Mac and get the most out of your system.
Professional & Reliable Data Recovery Software for PC and Mac
- Support
- Retrieve My Code
- User Guide
- FAQ
- Blog
- Resources


